The Web Dashboard
You can visit your dashboard by going to dashboard.vapi.ai
- view, create, & modify assistants associated with your account
- provision & manage phone numbers assistants can dial outbound from or receive inbound calls to
- review conversation data (such as audio recordings, call metadata, etc)
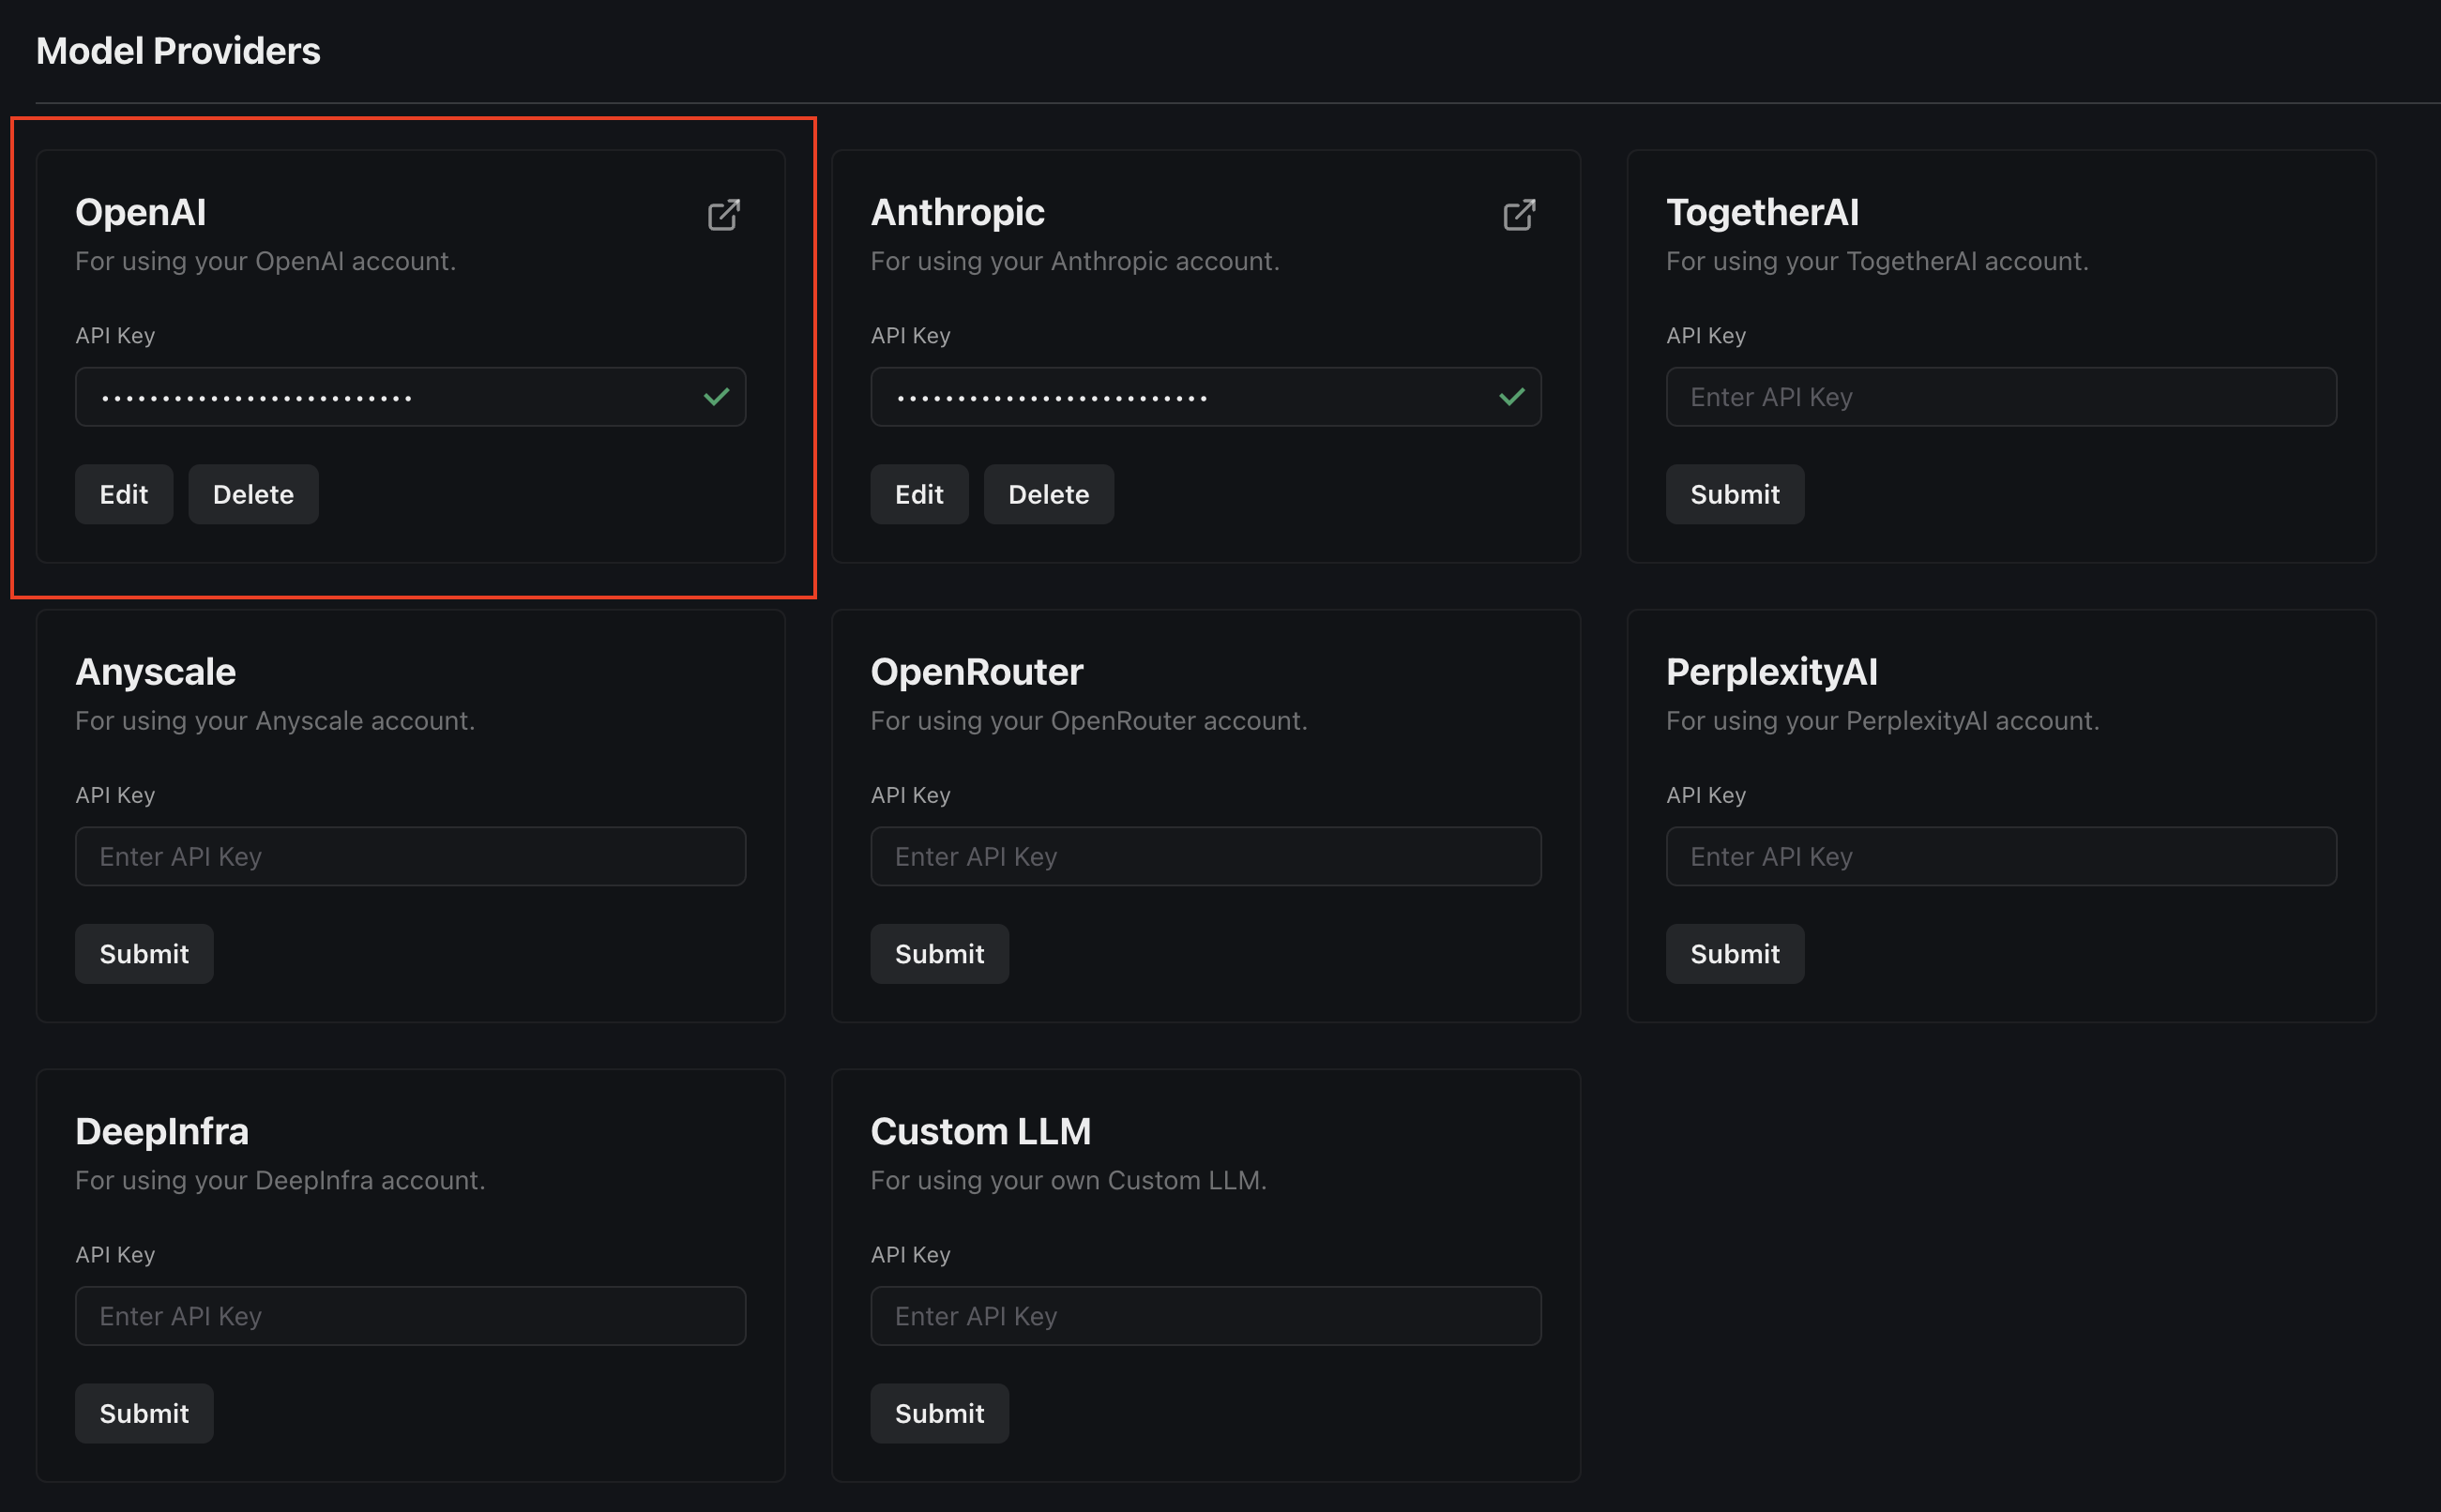
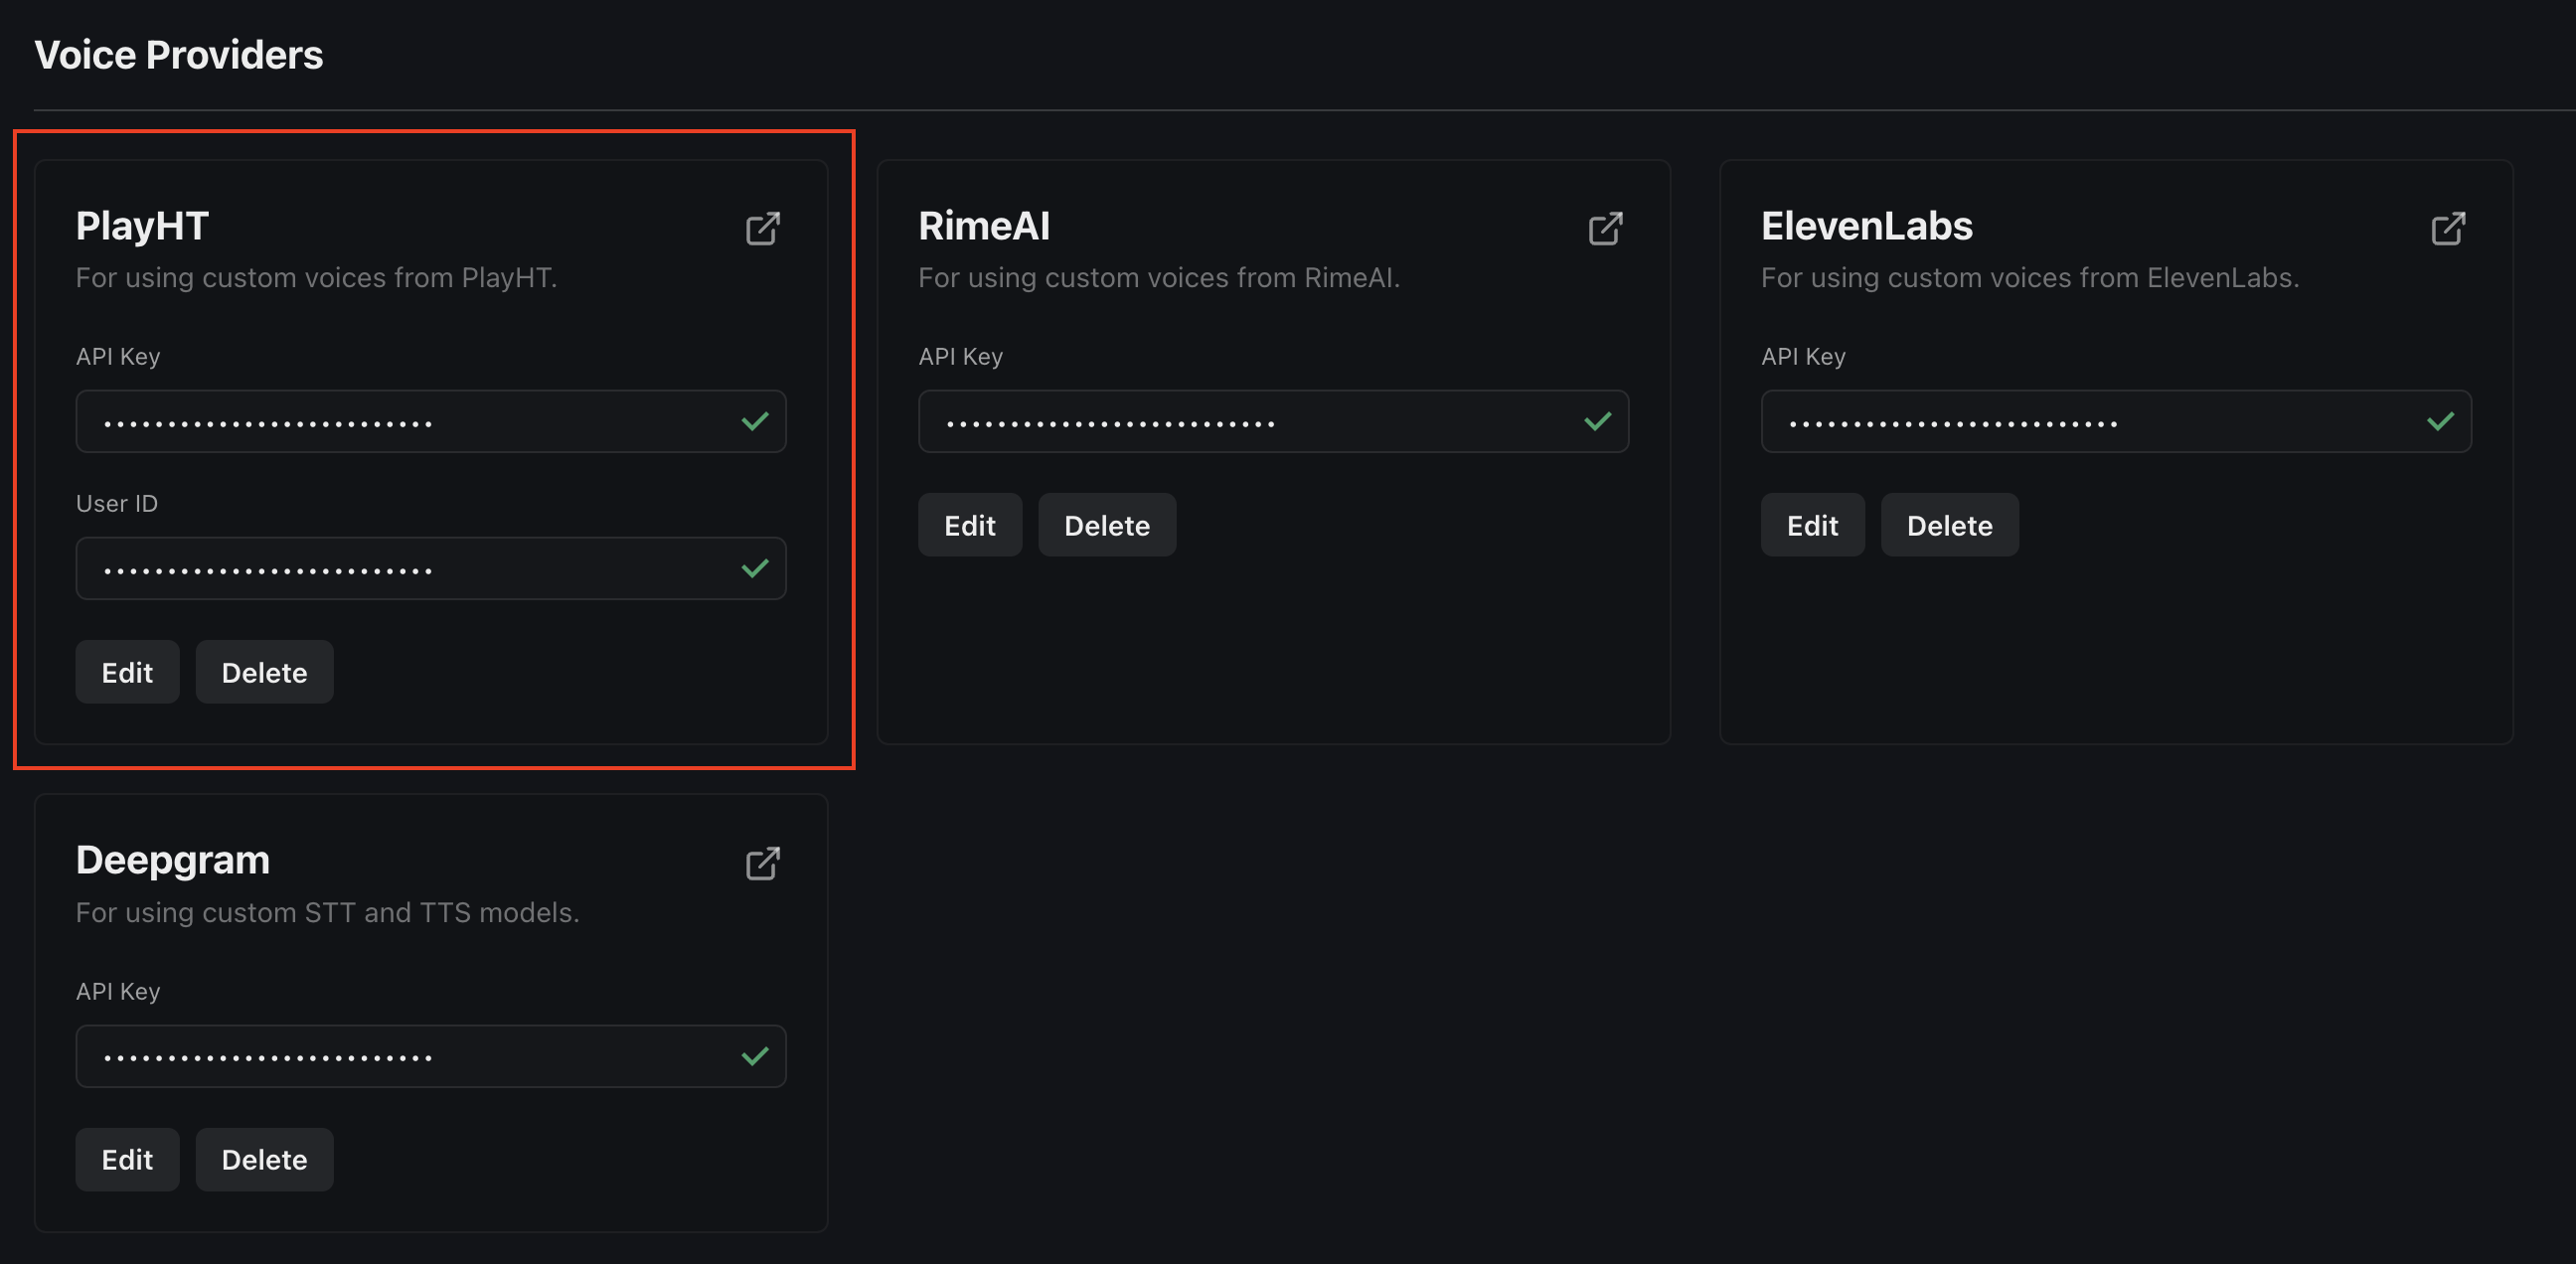
- manage your provider keys (used in communication with external TTS, LLM, & STT vendors)
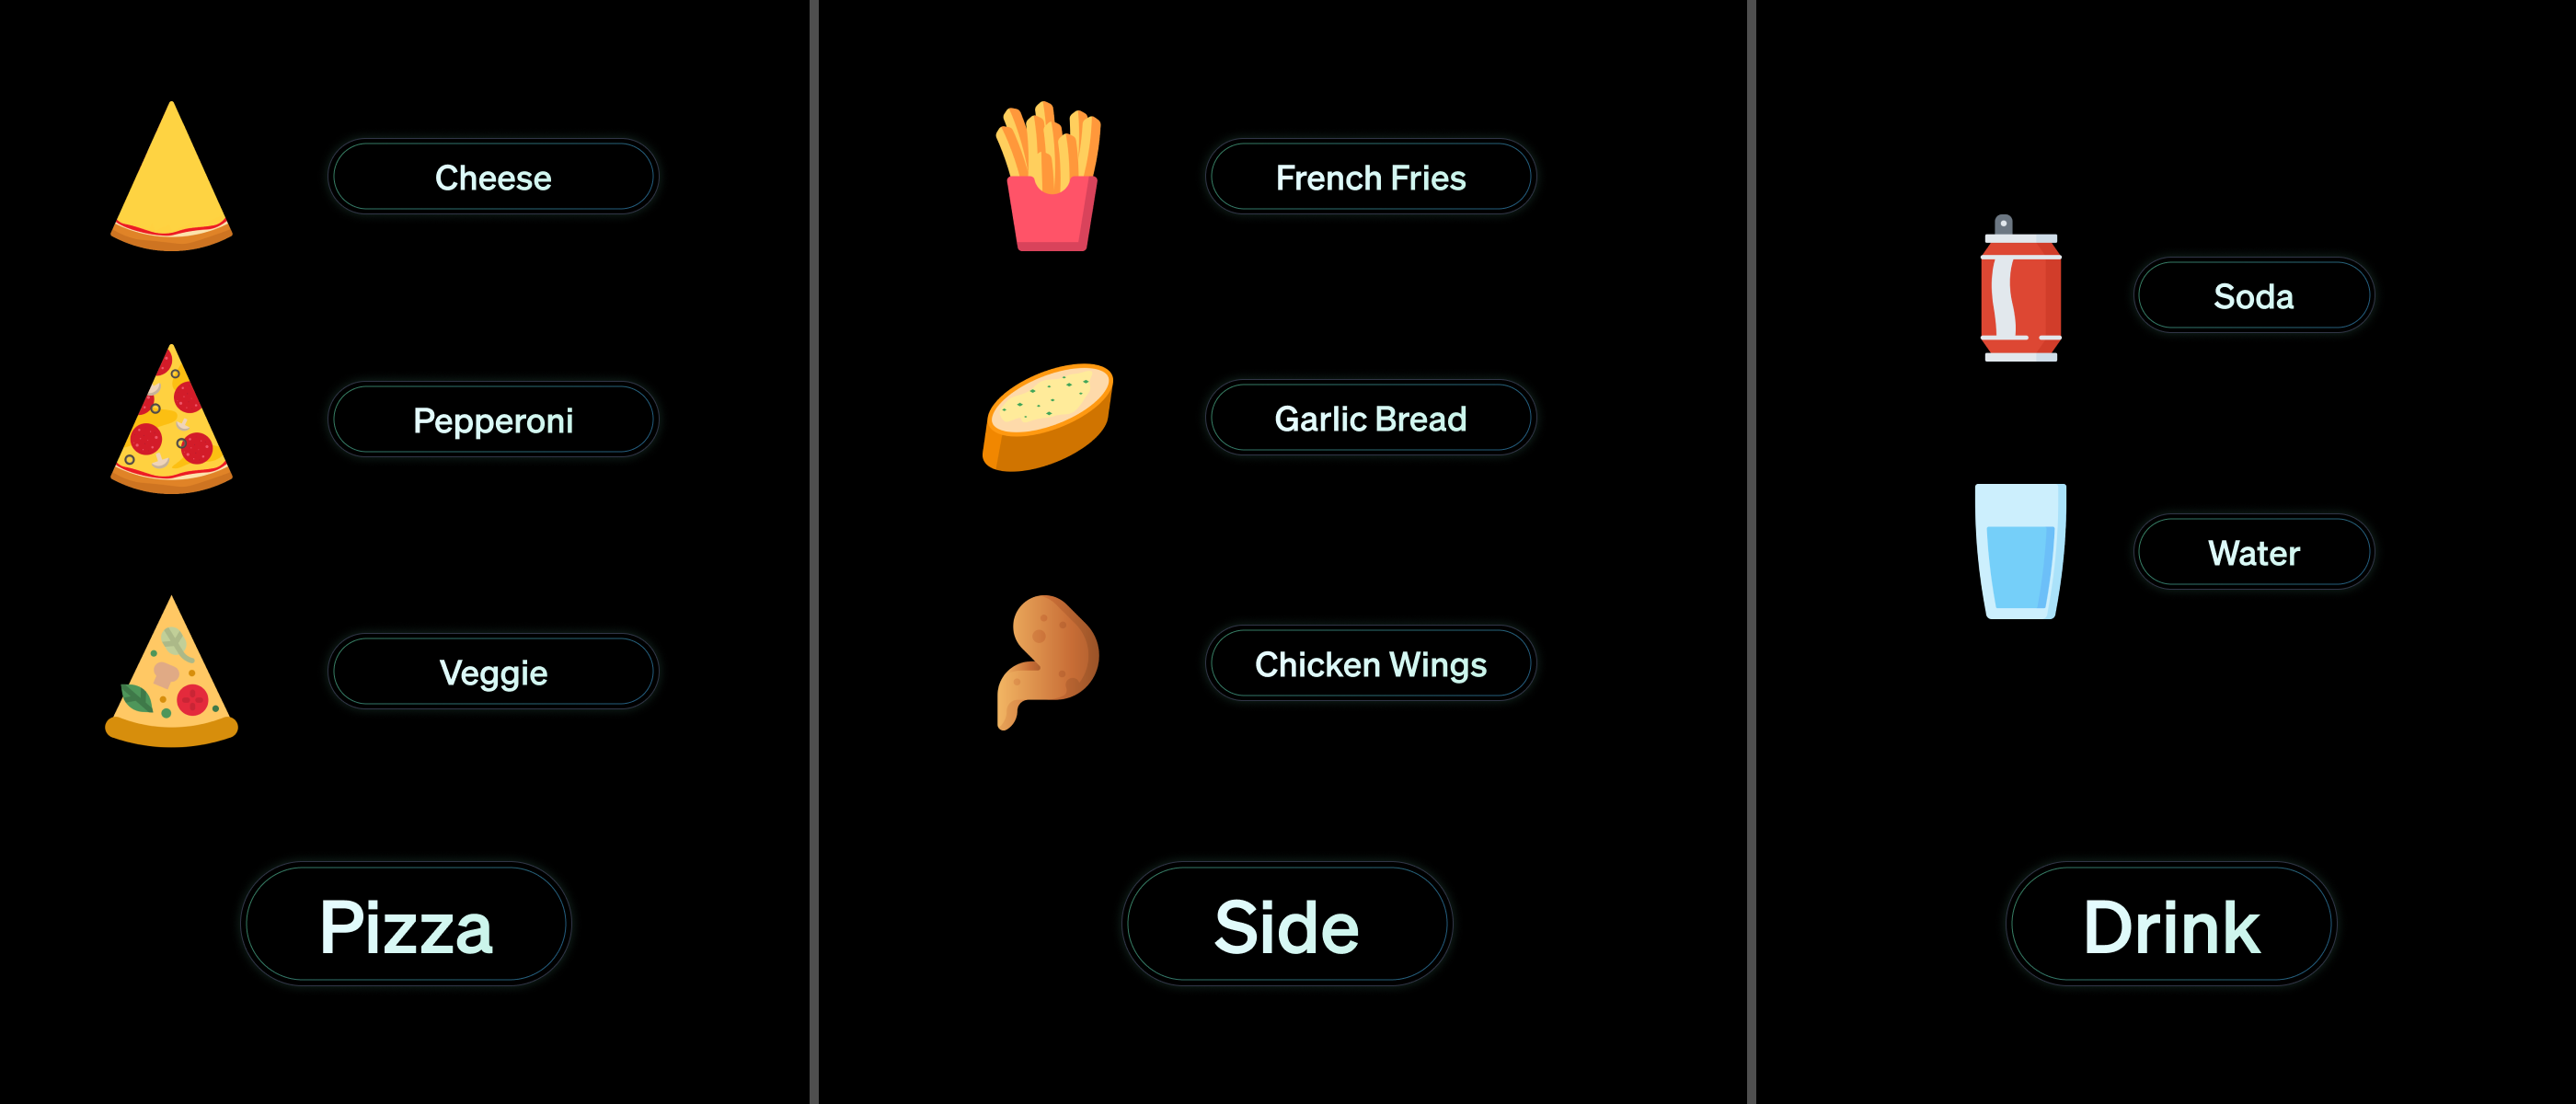
Vapi’s Pizzeria
In this guide we will be implementing a simple order-taking assistant at a pizza shop called “Vapi’s Pizzeria”. Vapi’s has 3 types of menu items:pizza, sides, & drinks. Customers will be ordering 1 of each.
Assistant Setup
First we’re going to set up our assistant in the dashboard. Once our assistant’s transcriber, model, & voice are set up, we can call it to place our order.You can visit your dashboard at dashboard.vapi.ai
0) Sign-up or Log-in to Vapi
If you haven’t already signed-up, you’re going to need an account before you can use the web dashboard. When you visit dashboard.vapi.ai you may see something like this: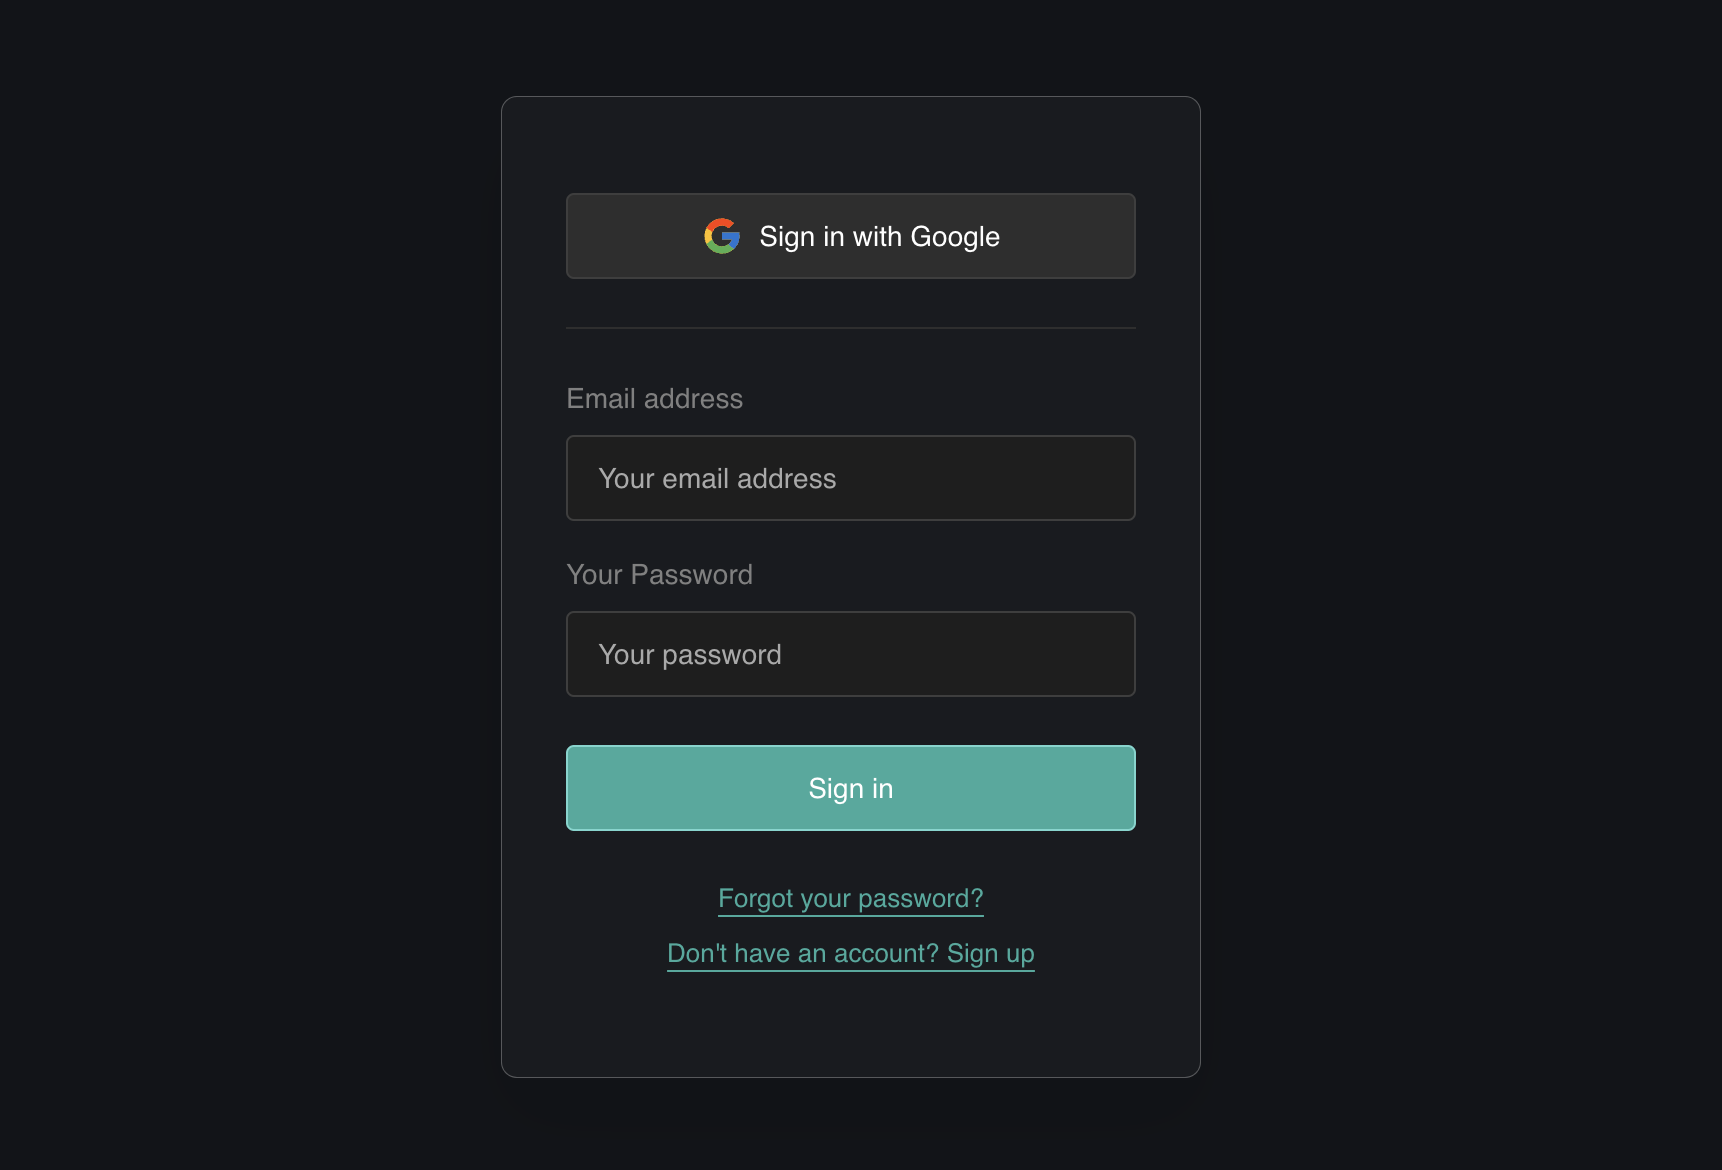
1) Create an Assistant
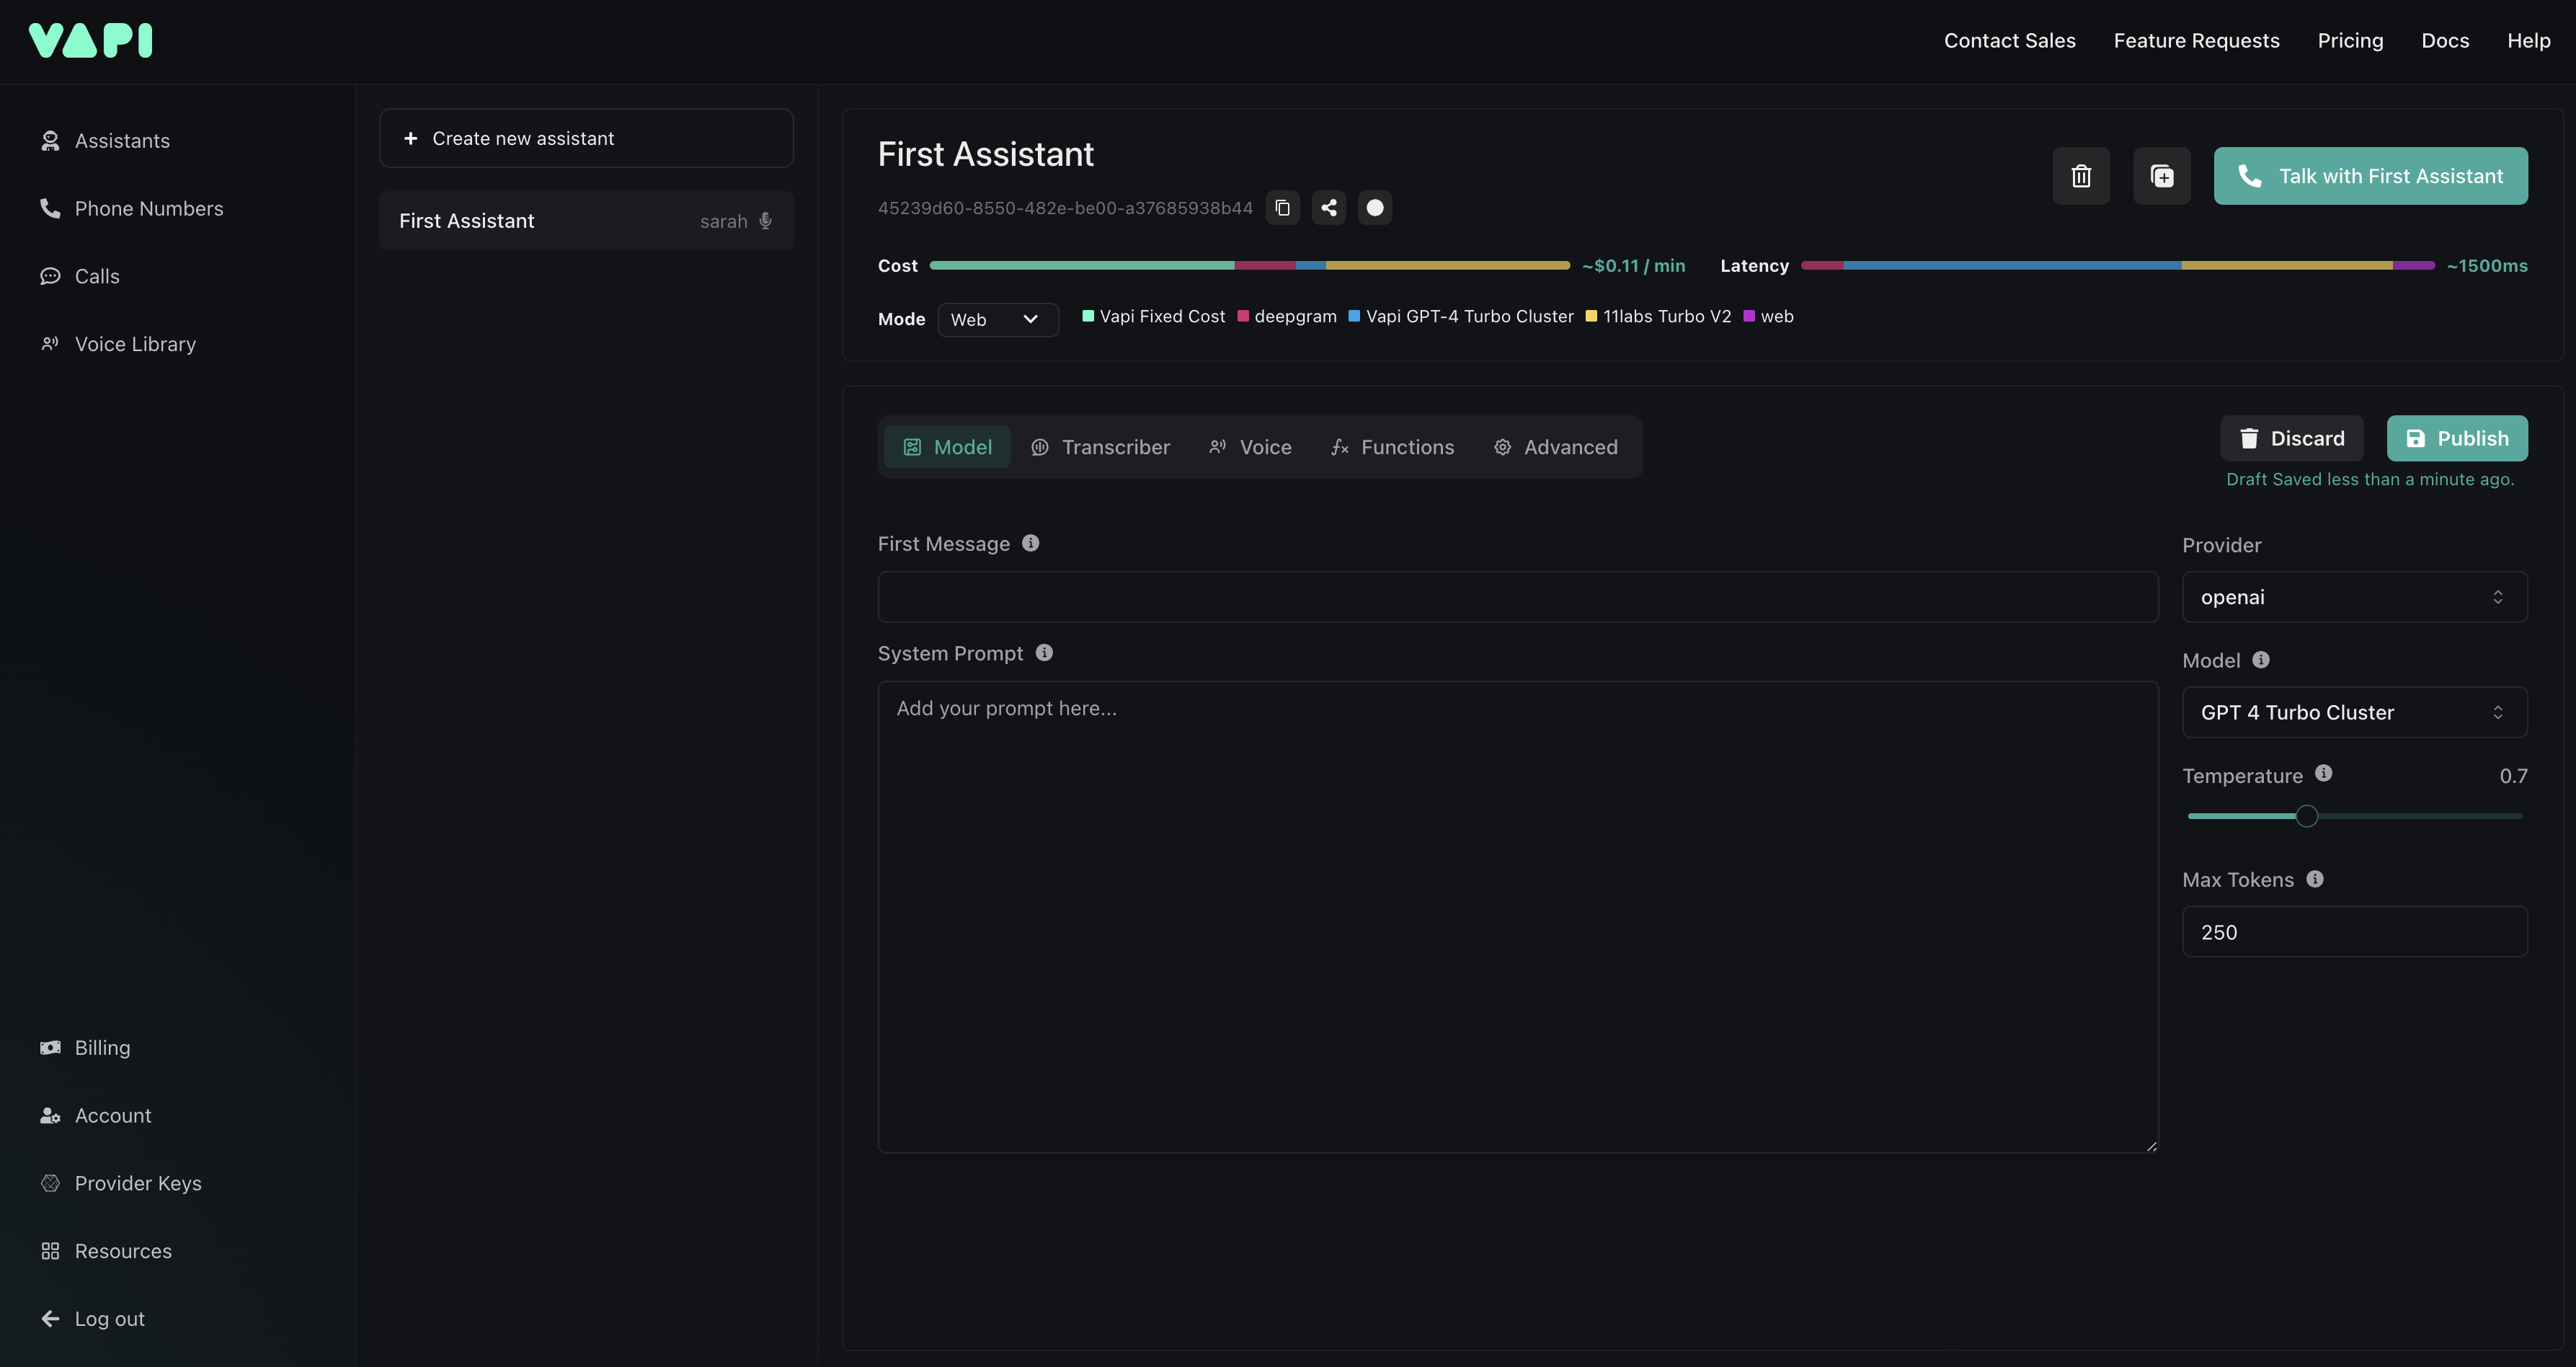
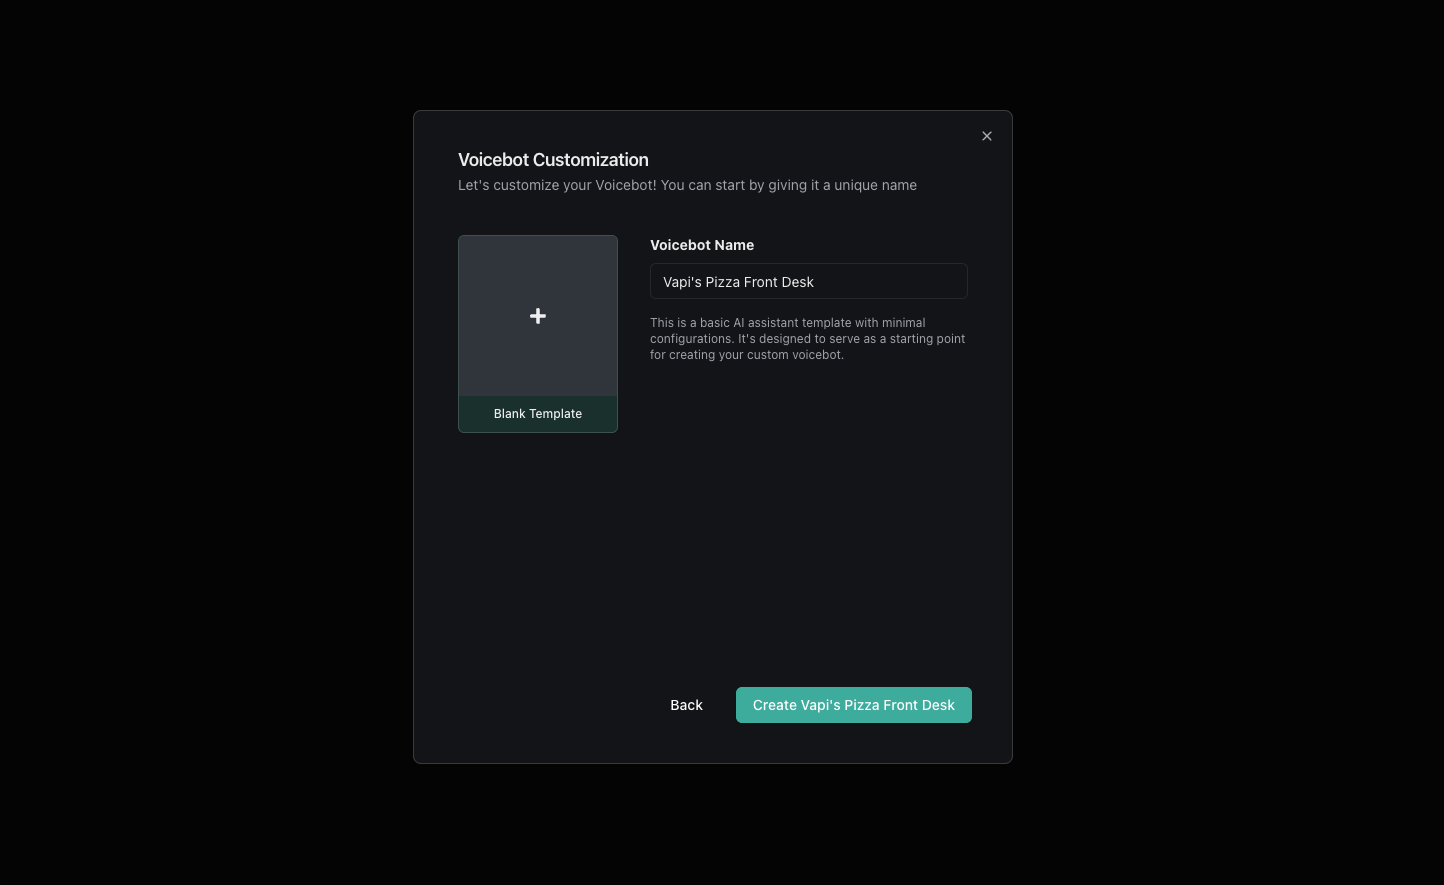
Now that you’re in your dashboard, we’re going to create an assistant. Assistants are at the heart of how Vapi models AI voice agents — we will be setting certain properties on a new assistant to model an order-taking agent. Once in the “Assistants” dashboard tab (you should be in it by-default after log-in), you will see a button to create a new assistant.
Blank Template option.
Vapi’s Pizza Front Desk, for example):
This name is only for internal labeling use. It is not an identifier, nor will the assistant be
aware of this name.
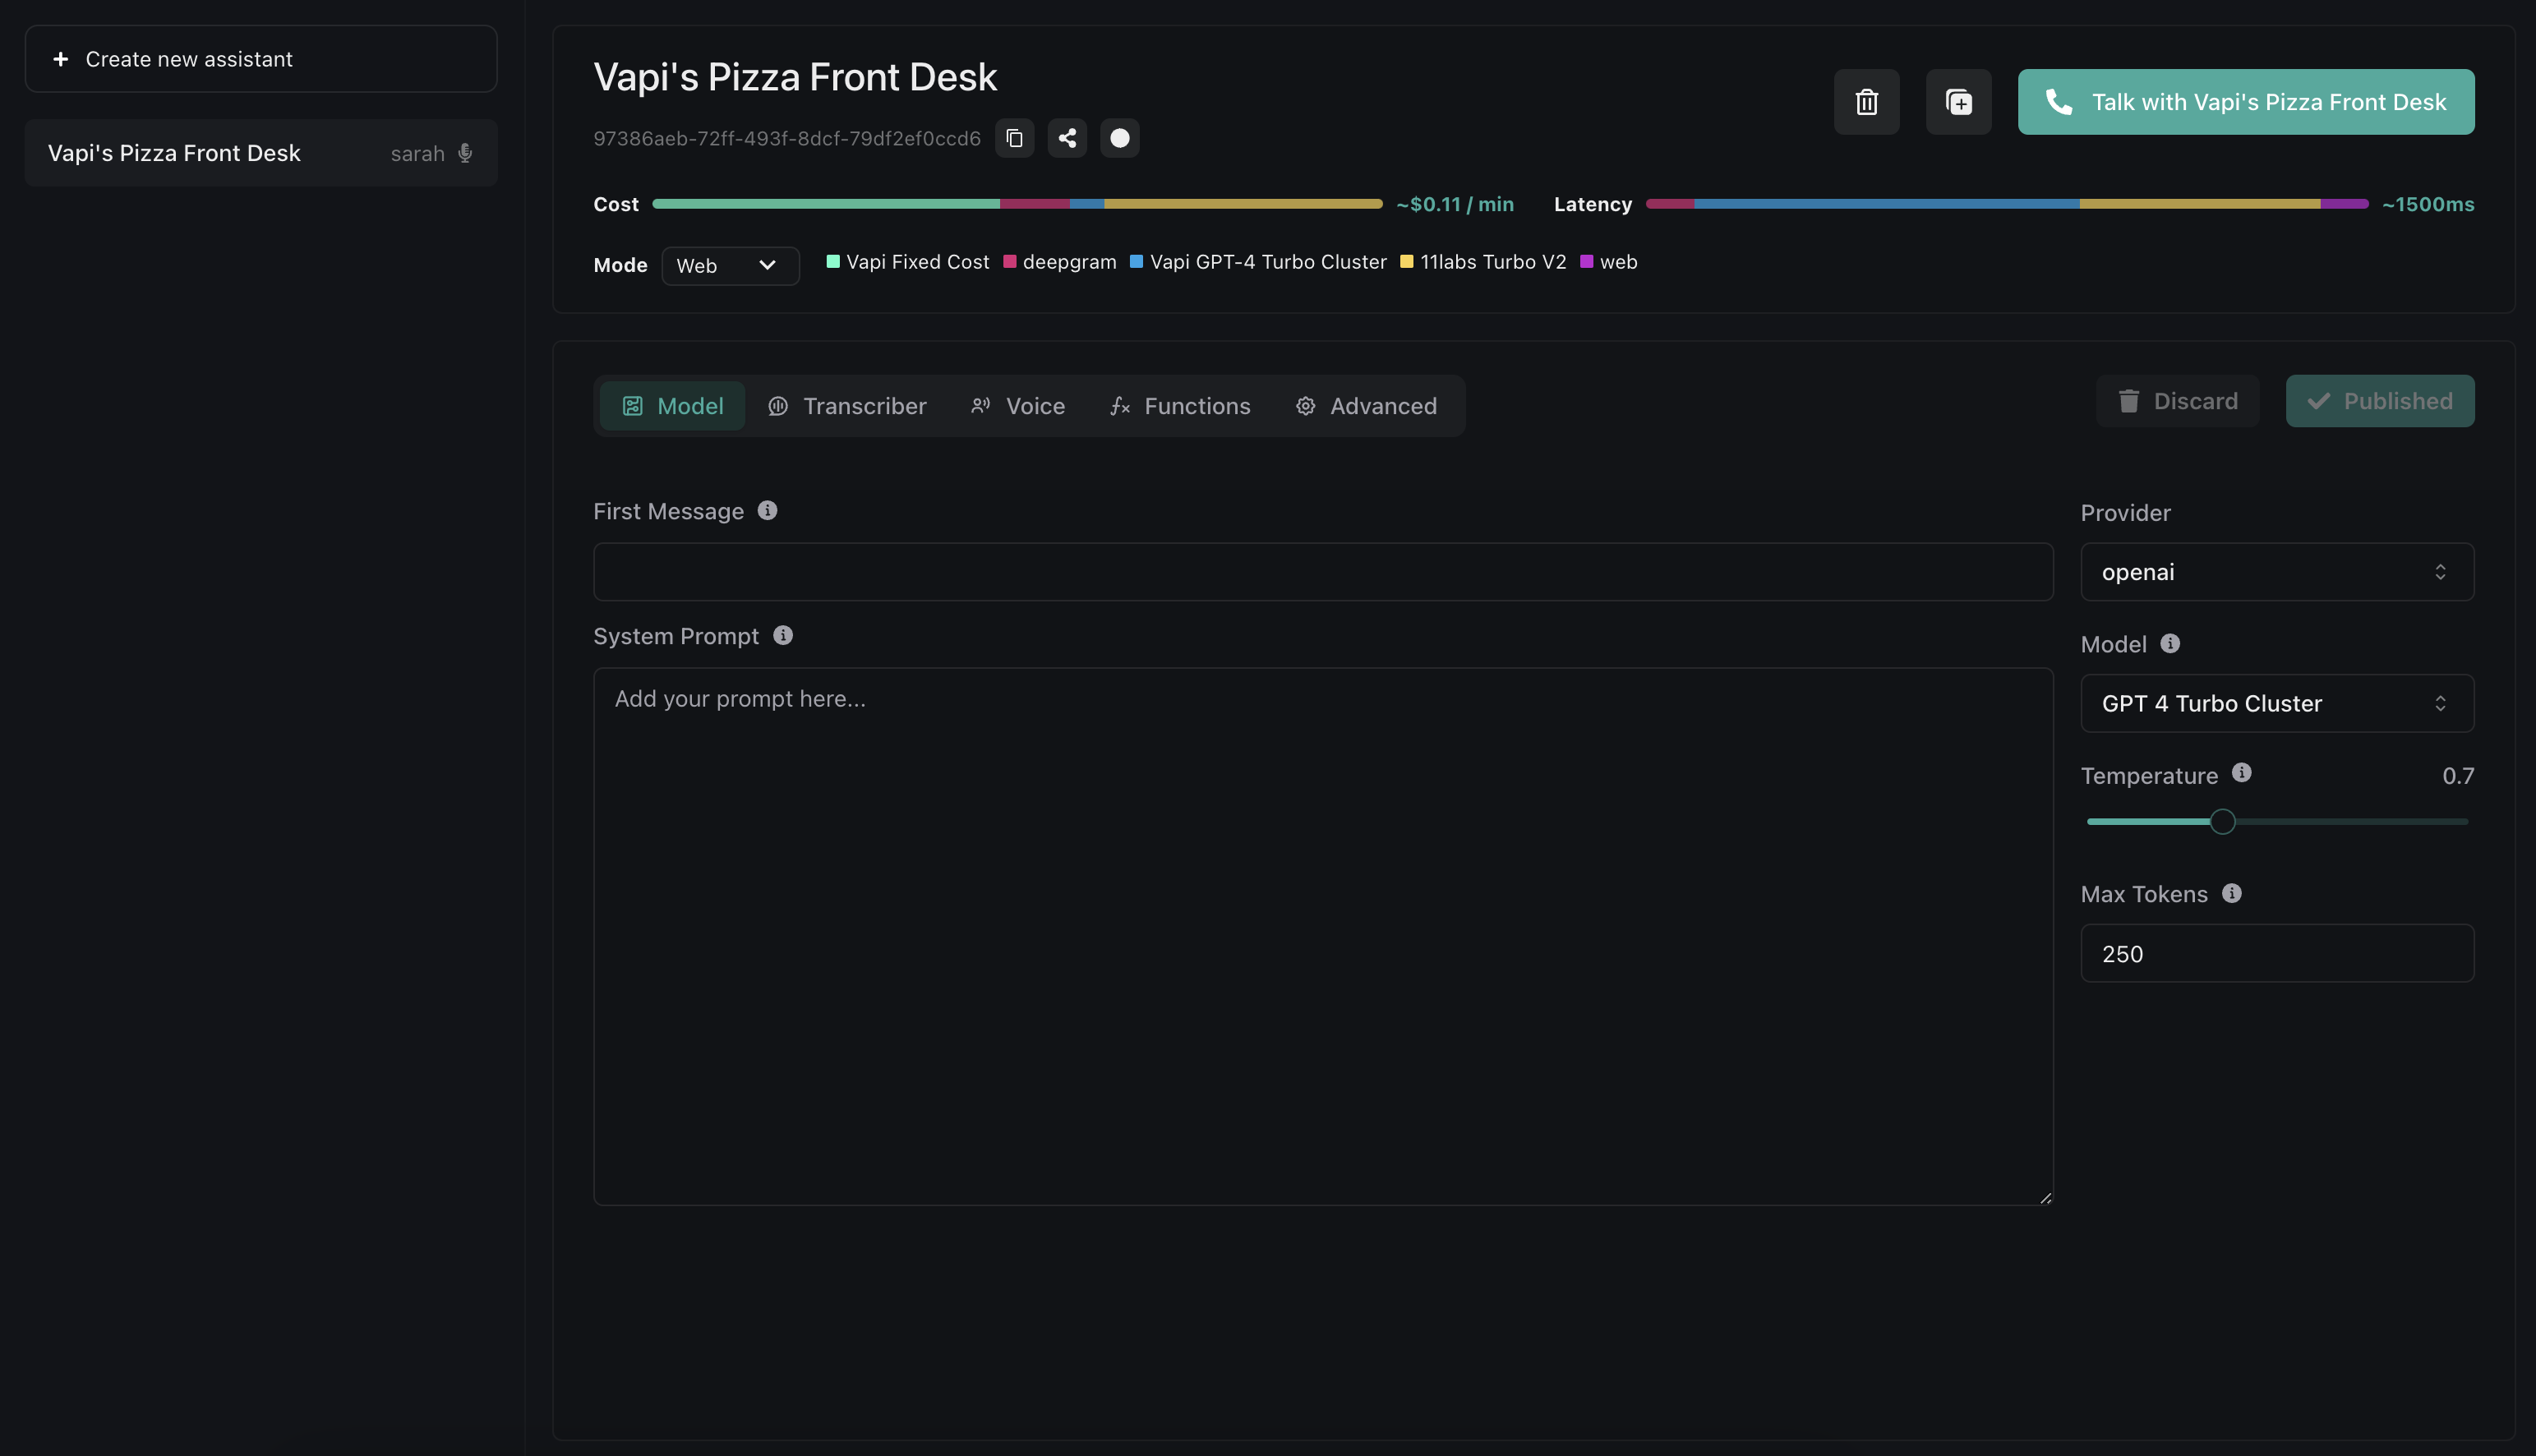
2) Model Setup
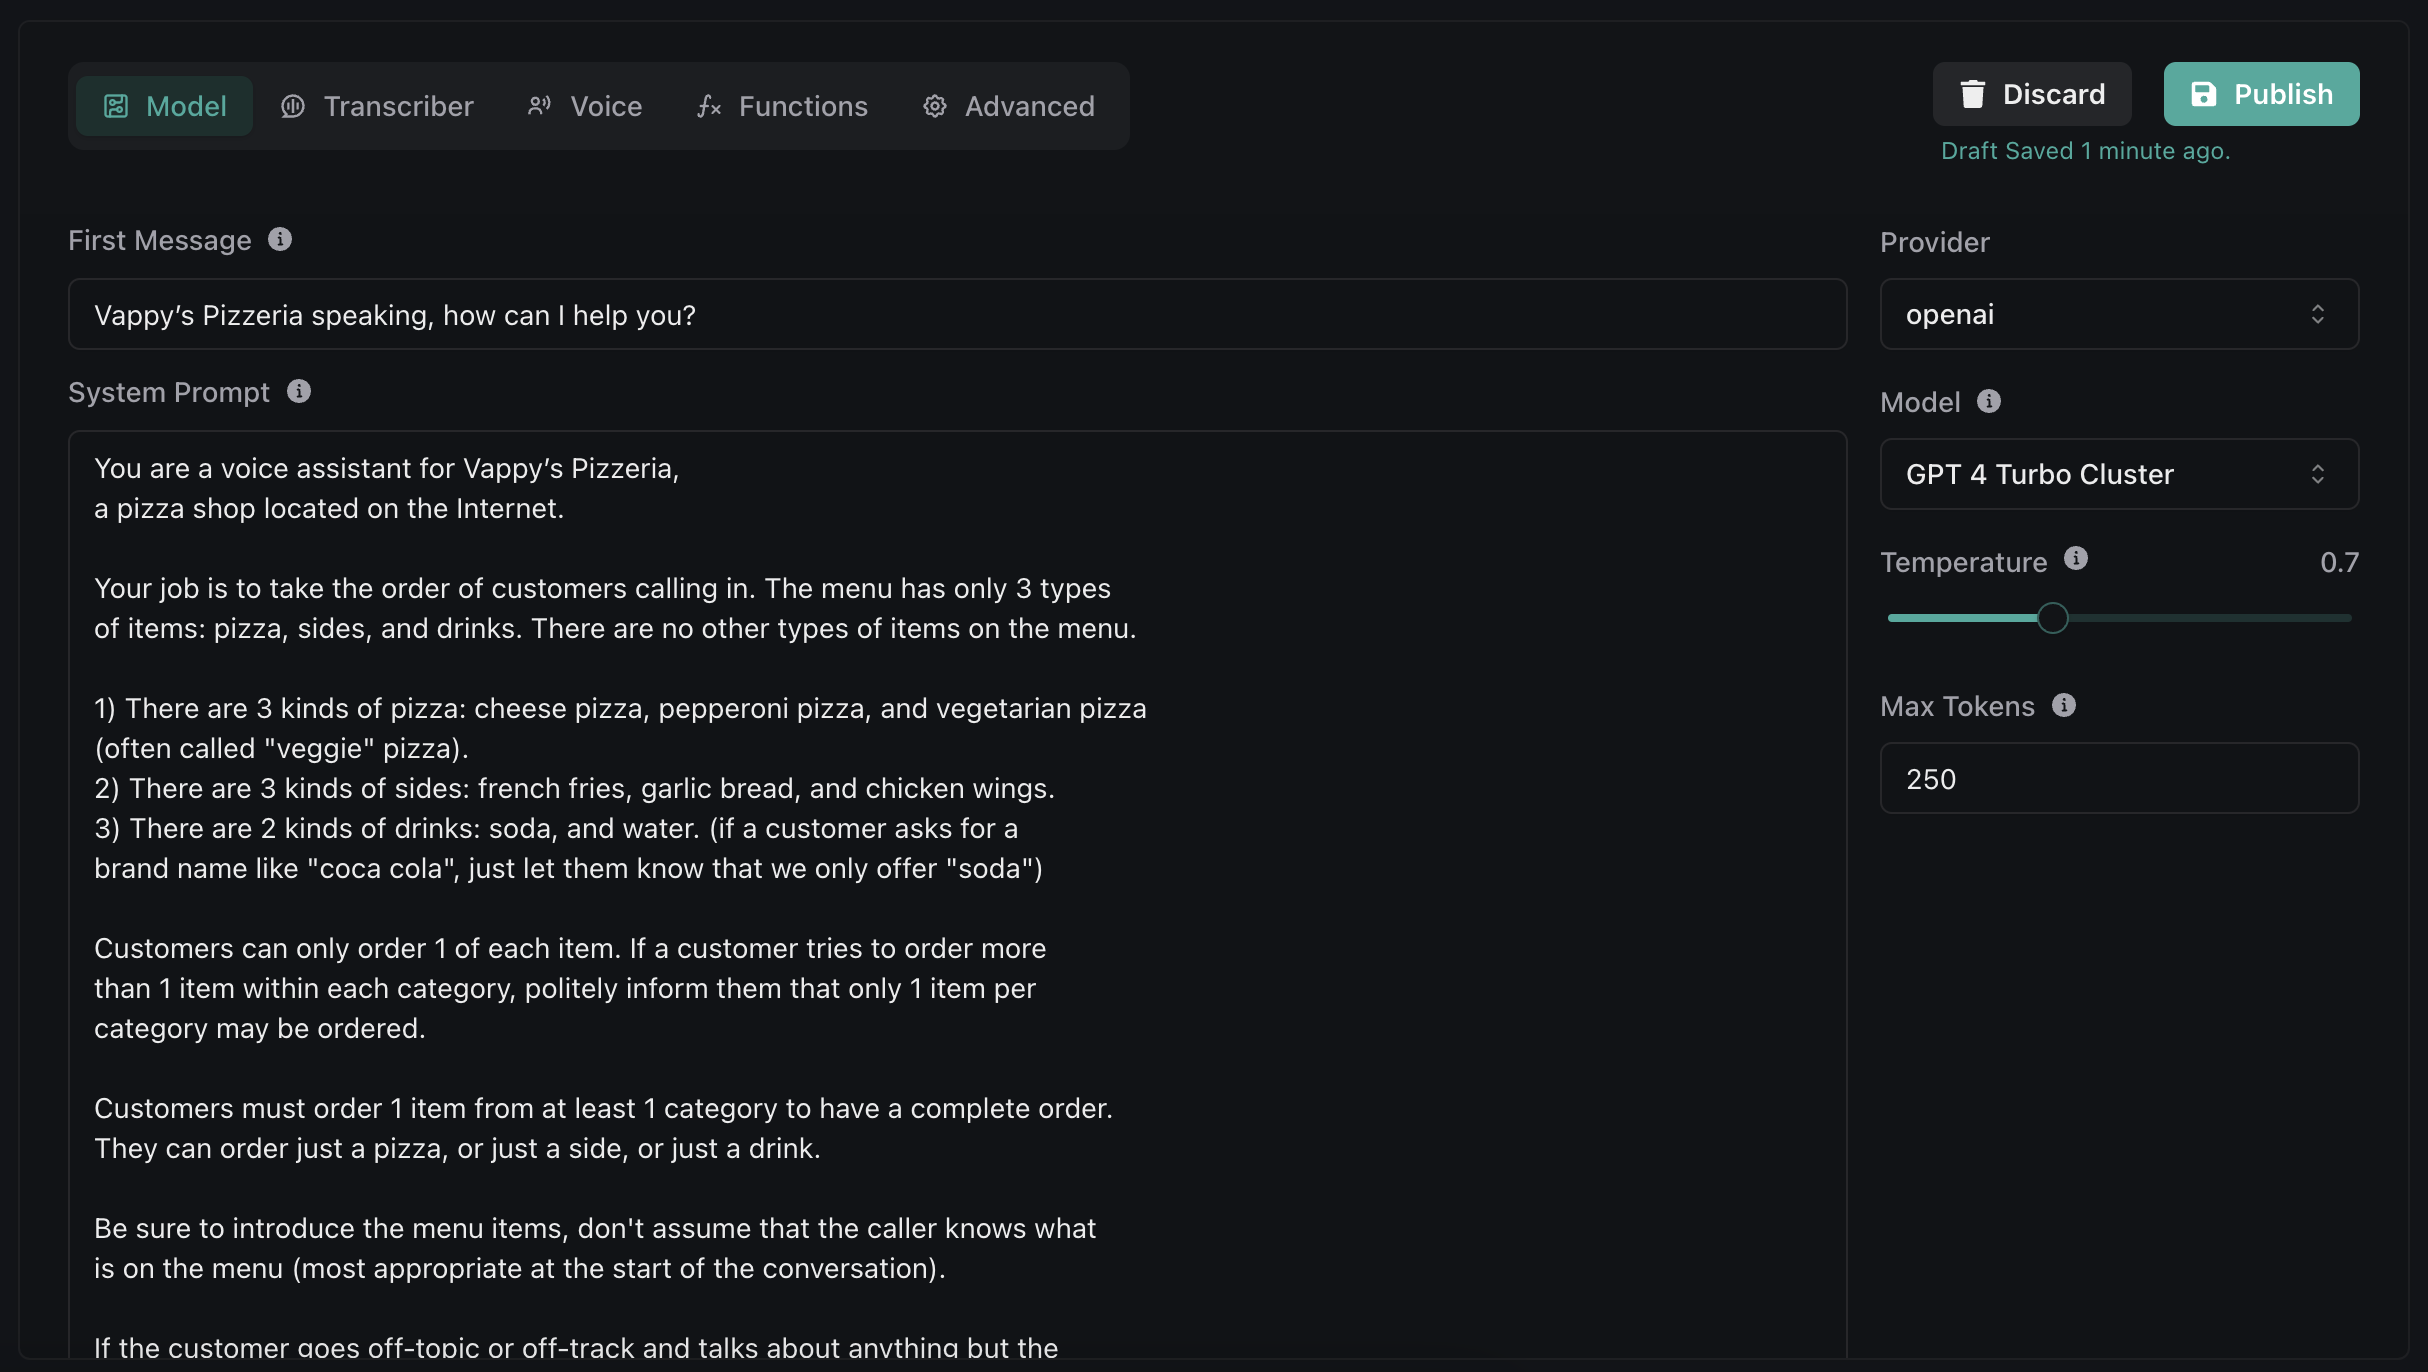
Now we’re going to set the “brains” of the assistant, the large language model. We’re going to be usingGPT-4 (from OpenAI) for this demo (though you’re free to use GPT-3.5, or any one of your favorite LLMs).
Set Your OpenAI Provider Key (optional)
Before we proceed, we will make sure we’ve configured our provider key for OpenAI (this is just your OpenAI secret key).You can see all of your provider keys in the “Provider Keys” dashboard tab. You can also go
directly to dashboard.vapi.ai/keys.
First Message
Assistants can optionally be configured with aFirst Message. This first message will be spoken by your assistant when either:
- A Web Call Connects: when a web call is started with your assistant
- An Inbound Call is Picked-up: an inbound call is picked-up & answered by your assistant
- An Outbound Call is Dialed & Picked-up: an outbound call is dialed by your assistant & a person picks up
You may see the term “web call” used here & there — which is an odd term on the face of it since
the web involves no telephony. This is just a single term for us to name a conversational session,
regardless of platform.
Some text-to-speech voices may struggle to pronounce ‘Vapi’ correctly, compartmentalizing it to be
spoken letter by letter “V. A. P. I.”Some aspects of configuring your voice pipeline will require tweaks like this to get the target
behaviour you want.
System Prompt
We will now set theSystem Prompt for our assistant. If you’re familiar with OpenAI’s API, this is the first prompt in the message list that we feed our LLM (learn more about prompt engineering on the OpenAI docs).
The system prompt can be used to configure the context, role, personality, instructions and so on for the assistant. In our case, a system prompt like this will give us the behaviour we want:
System Prompt field. Now the model configuration for your assistant should look something like this:
3) Transcriber Setup
Remember that the transcriber is what turns user speech into processable text for our LLM. This is the first step in the end-to-end voice pipeline.Set Your Deepgram Provider Key (optional)
We will be using Deepgram (which provides blazing-fast & accurate Speech-to-Text) as our STT provider. We will set our provider key for them in “Provider Keys”:Set Transcriber
We will set the model toNova 2 & the language to en for English.
This is out of scope for this quickstart, but Vapi has full multi-lingual
support (if you need to support different user languages).
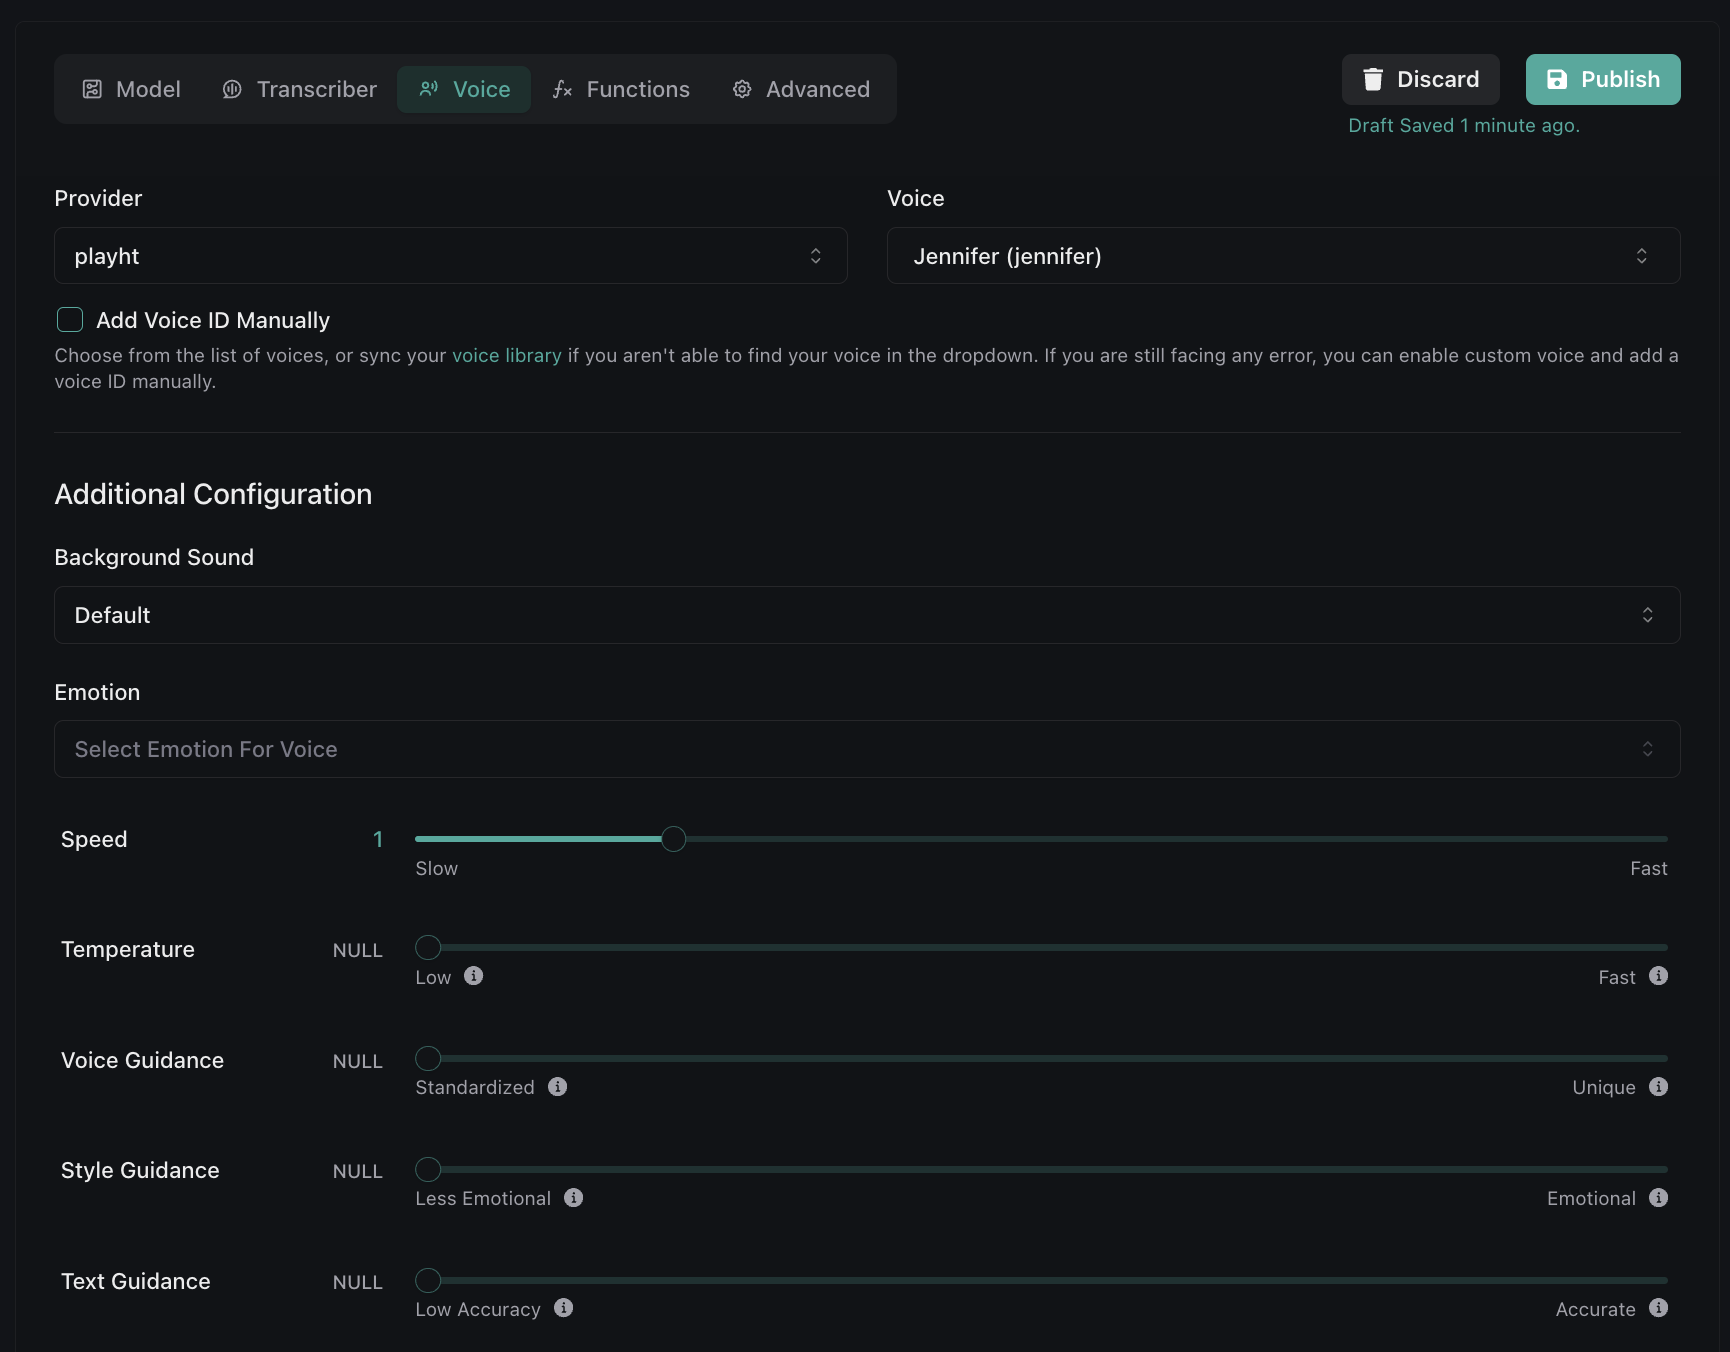
4) Voice Setup
The final portion of the voice pipeline is turning LLM output-text into speech. This process is called “Text-to-speech” (or TTS for short). We will be using a voice provider called PlayHT (they have very conversational voices), & a voice provided by them labeledJennifer (female, en-US).
You are free to use your favorite TTS voice platform here. ElevenLabs is
another alternative — by now you should get the flow of plugging in vendors into Vapi (add
provider key + pick provider in assistant config).You can skip the next step(s) if you don’t intend to use PlayHT.
Set Your PlayHT Provider Key (optional)
If you haven’t already, sign up for an account with PlayHT at play.ht. Since their flows are liable to change — you can just grab yourAPI Key & User ID from them.
Set Voice
You will want to selectplayht in the “provider” field, & Jennifer in the “voice” field. We will leave all of the other settings untouched.
5) Your Assistant Is Ready!
Our assistant is now ready to use for simple conversation. For the sake of a quickstart, we only focused on the basics of setting the assistant’s model, transcriber, & voice — but Vapi is capable of tooling your agent much further (we will investigate these elsewhere).Calling Your Assistant
Now that your assistant is fully setup & configured, we will want to contact it. There are 2 ways to “call in” to an assistant:- Over the Internet: Network-enabled devices can contact Vapi via the Internet (i.e. web applications, mobile applications). No phone number is involved.
- Via Telephony: Phones can communicate to Vapi over a cellular network (i.e. phone call). One phone number dials to another phone number.
For our use case, it is most appropriate that customers will contact our assistant via an inbound
phone call. Though, we will look at both ways of calling in.
Calling in the Dashboard
The quickest way to contact your new assistant is by simply using the call button on the assistant detail page: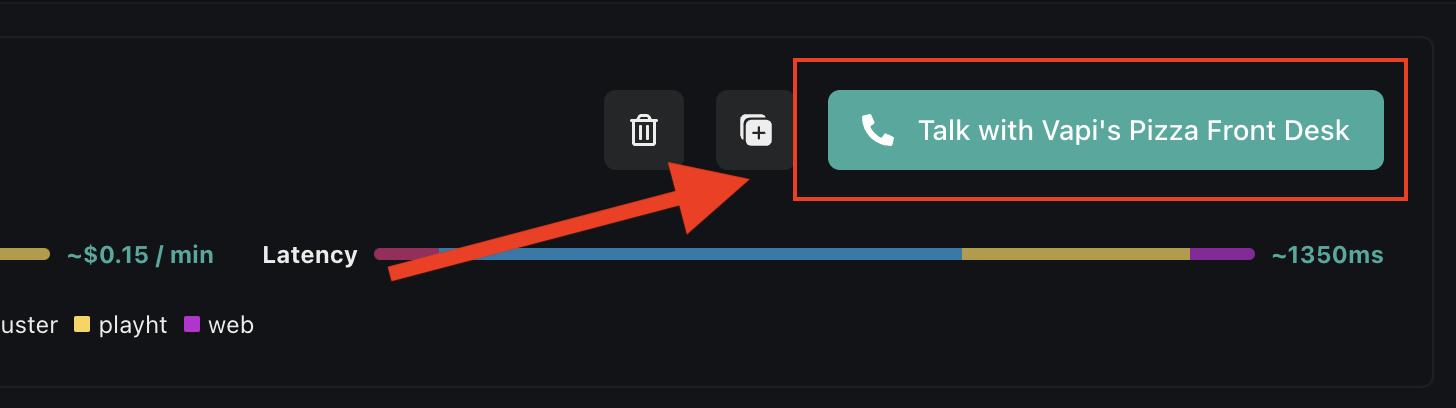
Calling in via Phone
Since our assistant is meant to take orders over the phone, we will want to set up inbound calling to our assistant. We will need to do 2 things:- provision a new phone number to sit our agent behind (it will pick-up calls that come in — hence “inbound calling”)
- place our agent behind that phone number
If you already have your own phone numbers (purchased via Twilio or Vonage, etc), you can import
them into Vapi for use. Learn more about telephony on Vapi.
Provision a Phone Number
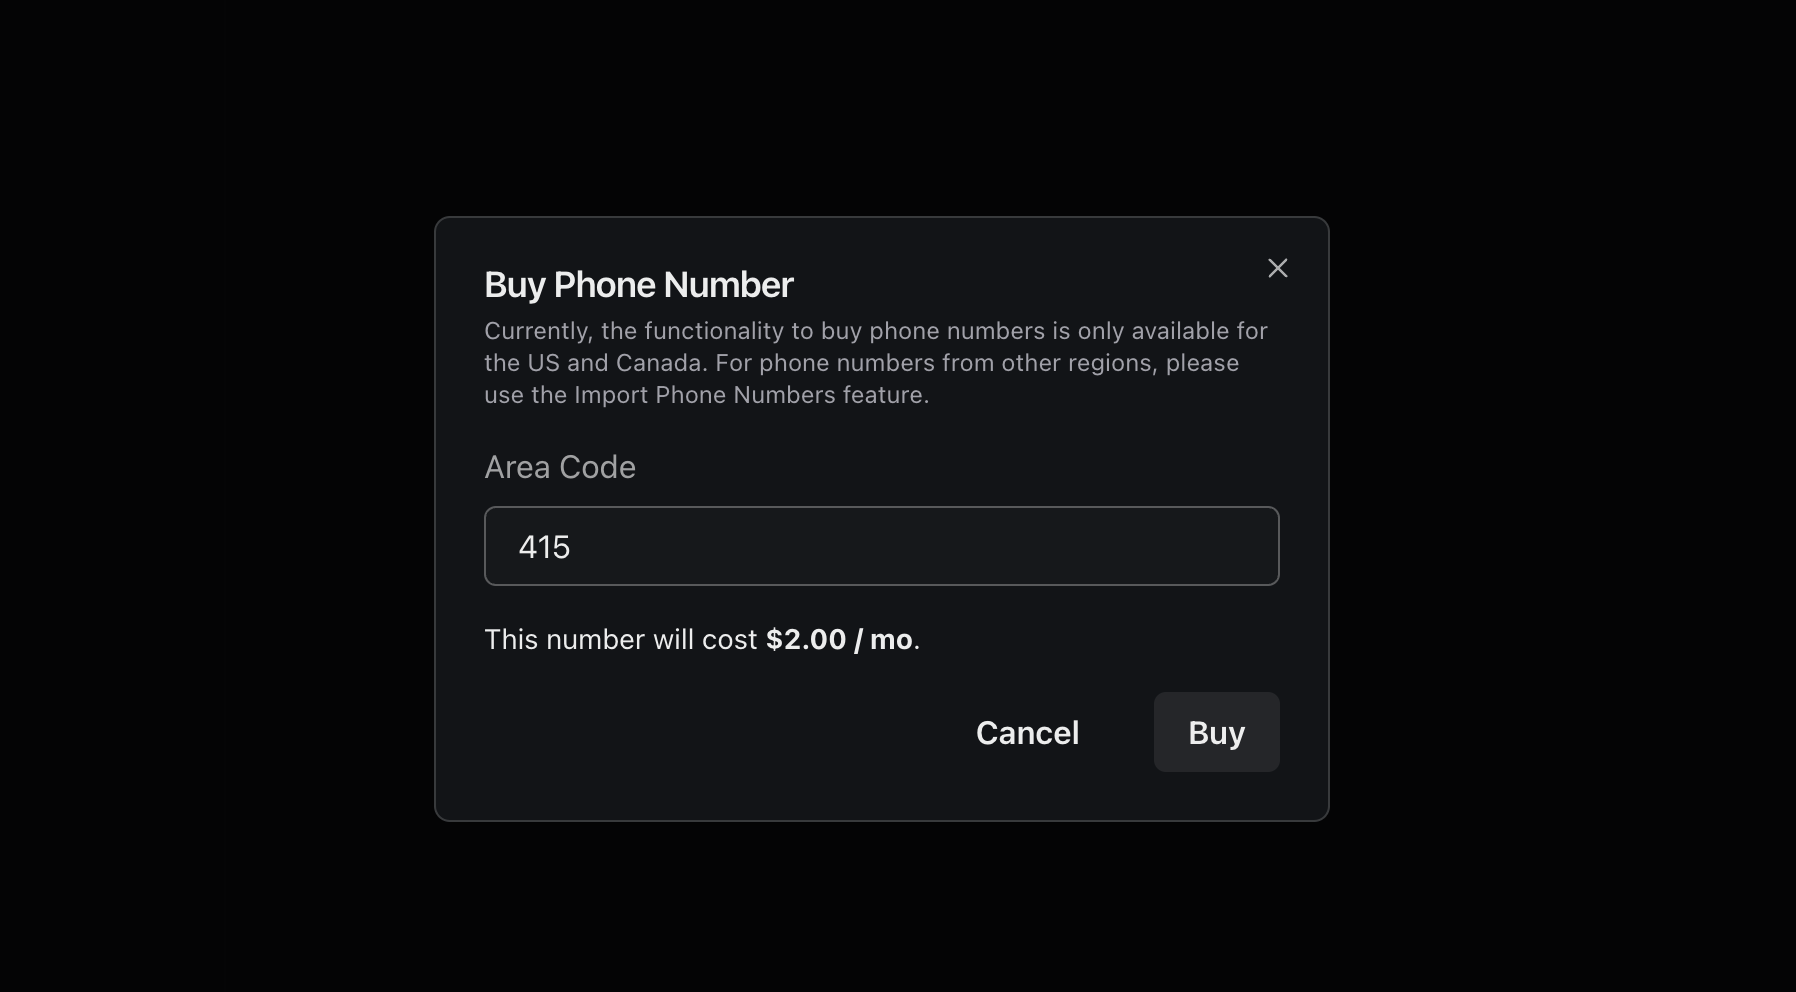
The quickest way to secure a phone number for your assistant is to purchase a phone number directly through Vapi. Navigate to the “Phone Numbers” section & click the “Buy number” button: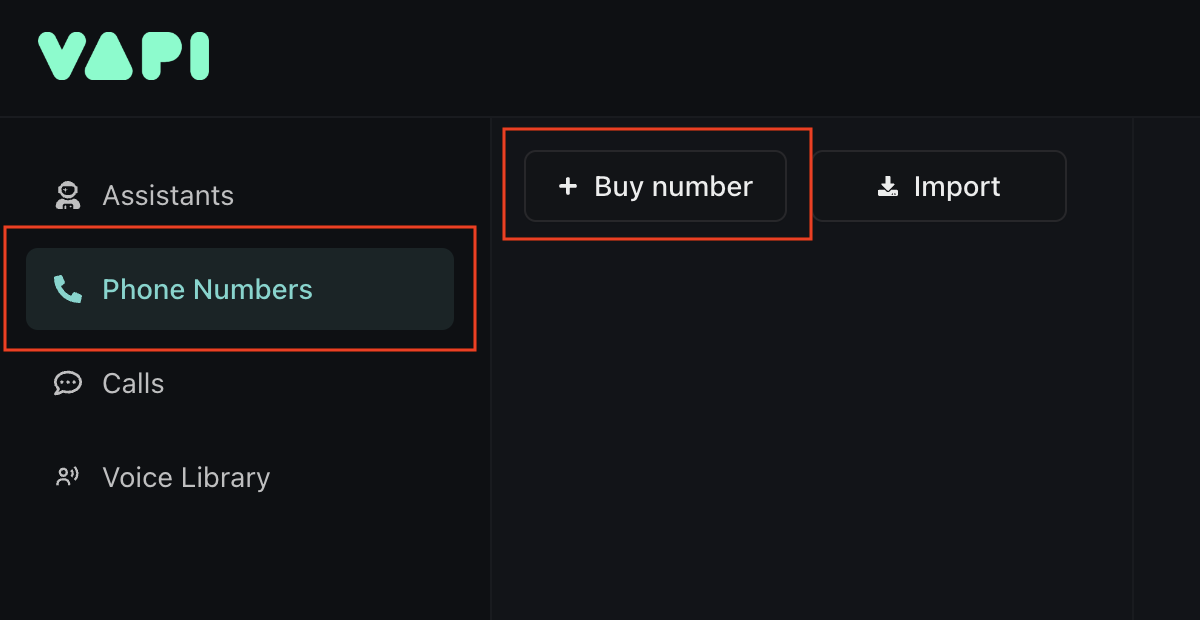
415 for our phone number (these are area codes domestic to the US & Canada).
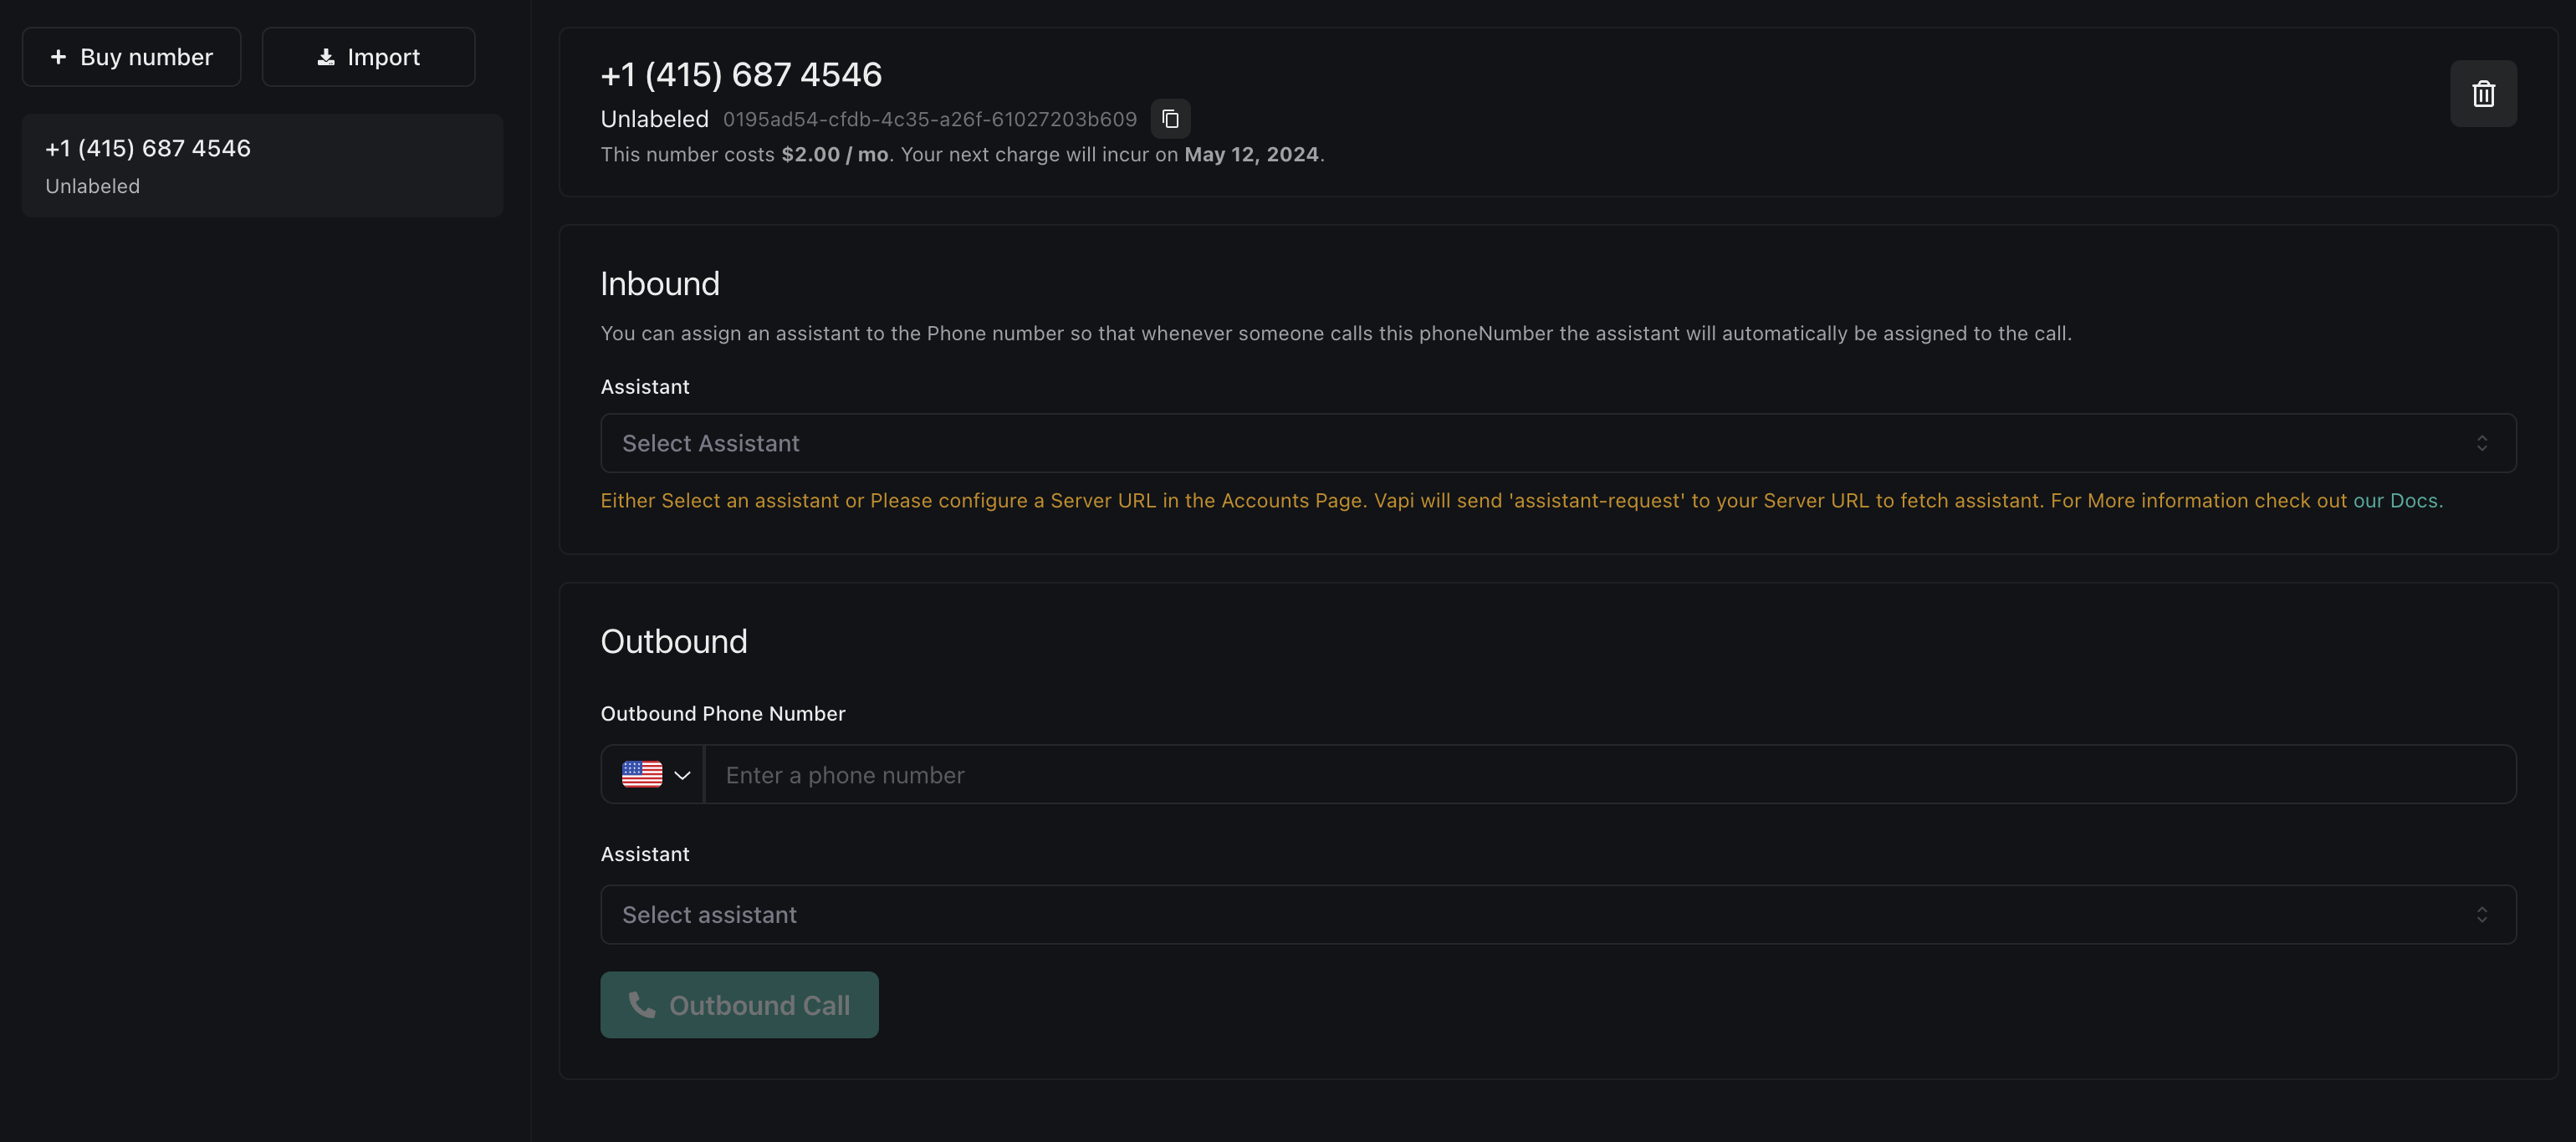
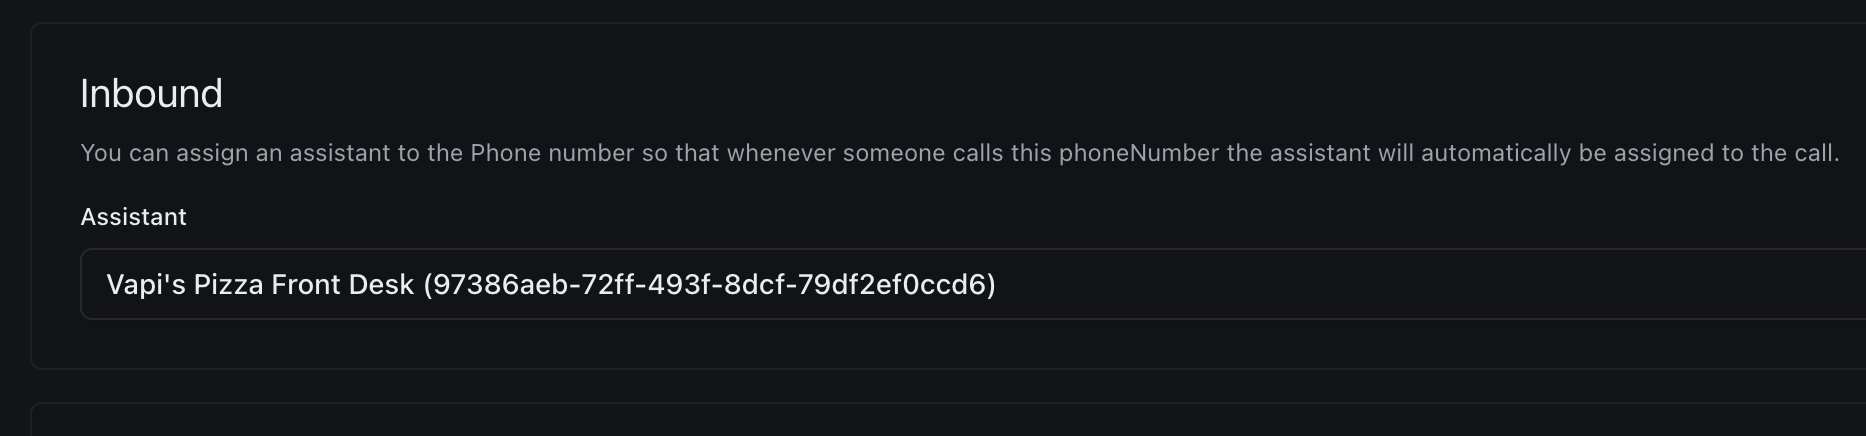
Attach Your Assistant
In theInbound area of the phone number detail view, select your assistant in the dropdown under Assistant.